Thursday, December 30, 2010

COTTAGE CUTZ - OWL DIE

I seem to be leaning towards collecting a number of owl stamps and dies lately and when I saw this little fellow, well, I just had to have him.

The die is cut out using up scraps and I sponged the body and face sections with Distress Ink before assembly.  The branch comes with the die and I added some leaves punched from the Two Step Bird Punch from SU.

The background paper is from CM, the moon is made by offsetting a circle punch and the sentiment is from Clear Dollar.  The ovals on which the sentiment is stamped is from SU - Lots of Tags which is a Sizzlits die.

Friday, December 24, 2010

RECYCLED XMAS PACKAGING

On a recent visit to a local market we came across a stall selling all sorts of different alcohol.  As we had not yet finished our Xmas shopping we proceeded to help the really friendly owners make their target for the month !

Anyway, as part of DH's Xmas gift I bought him a couple of bottles of Irish Whiskey which came in this box.  Of course the box started out very different but I did see the potential in revamping it.

I used black cardstock to block out all the writing and embossed each piece top and bottom with a CB swiss dots border folder.  The sentiment is a CB alphabet cut out using glitter paper and the image is Elf Oliver from Sparkle Creations stamped on watercolour paper and coloured in using SU watercolour crayons, Marvy and SU markers. 

On the top of the box I used Nestabilities Big Scalloped Squares alternating in black and orange and then I made a bow from ribbon which came from a conference we attended last year.

I just love recyling boxes and have to be really careful not to become too much of a hoarder.

Wednesday, December 22, 2010

PEACHY KEEN - COLBY & JACK CHEESE SET

Peachy Keen stamps are really cute and this one is no exception.  I stamped the image onto Copic paper with Memento Black Tuxedo ink and used a Go Kreate oval die to frame it.  The yellow paper scalloped oval is also a die from Go Create.

With a fairly large area to colour in Copics do a better job and they blend rather well.  The Xmas hat was stamped separately, cut out and also coloured in using Copics.  The sentiment is from another Peachy Keen set and it fits so well into the SU ovals, plain and scalloped.  The background paper is CM.

I was really surprised at how quick this card was to colour in.  It helps that the image is so cute and such a pleasure to work with.

Monday, December 20, 2010

XMAS WINTER SCENE - UNKNOWN STAMP

This stamp was very kindly given to me by Belinda of the Scrap Studio.  There is no manufacturers marking on the side of the wooden block and I have not seen the image anywhere on my travels, hence me marking it as unknown.

This time I used watercolour paper to stamp the image onto as I wanted to use my Marvy and Tombow markers to colour it in.  I find Copics a bit challenging with a detailed image such as this.  The trees have a sprinkling of Stickles on and I used a couple of different Spica Glitter pens to highlight the bows on the wreaths.

I thought the Nestabilities Deckled Rectangles framed the image rather well and I used a couple of different CB border embossing folders on the sides of the card.  The tag is a SU punch and the sentiment is from a Penny Black set.

Friday, December 17, 2010

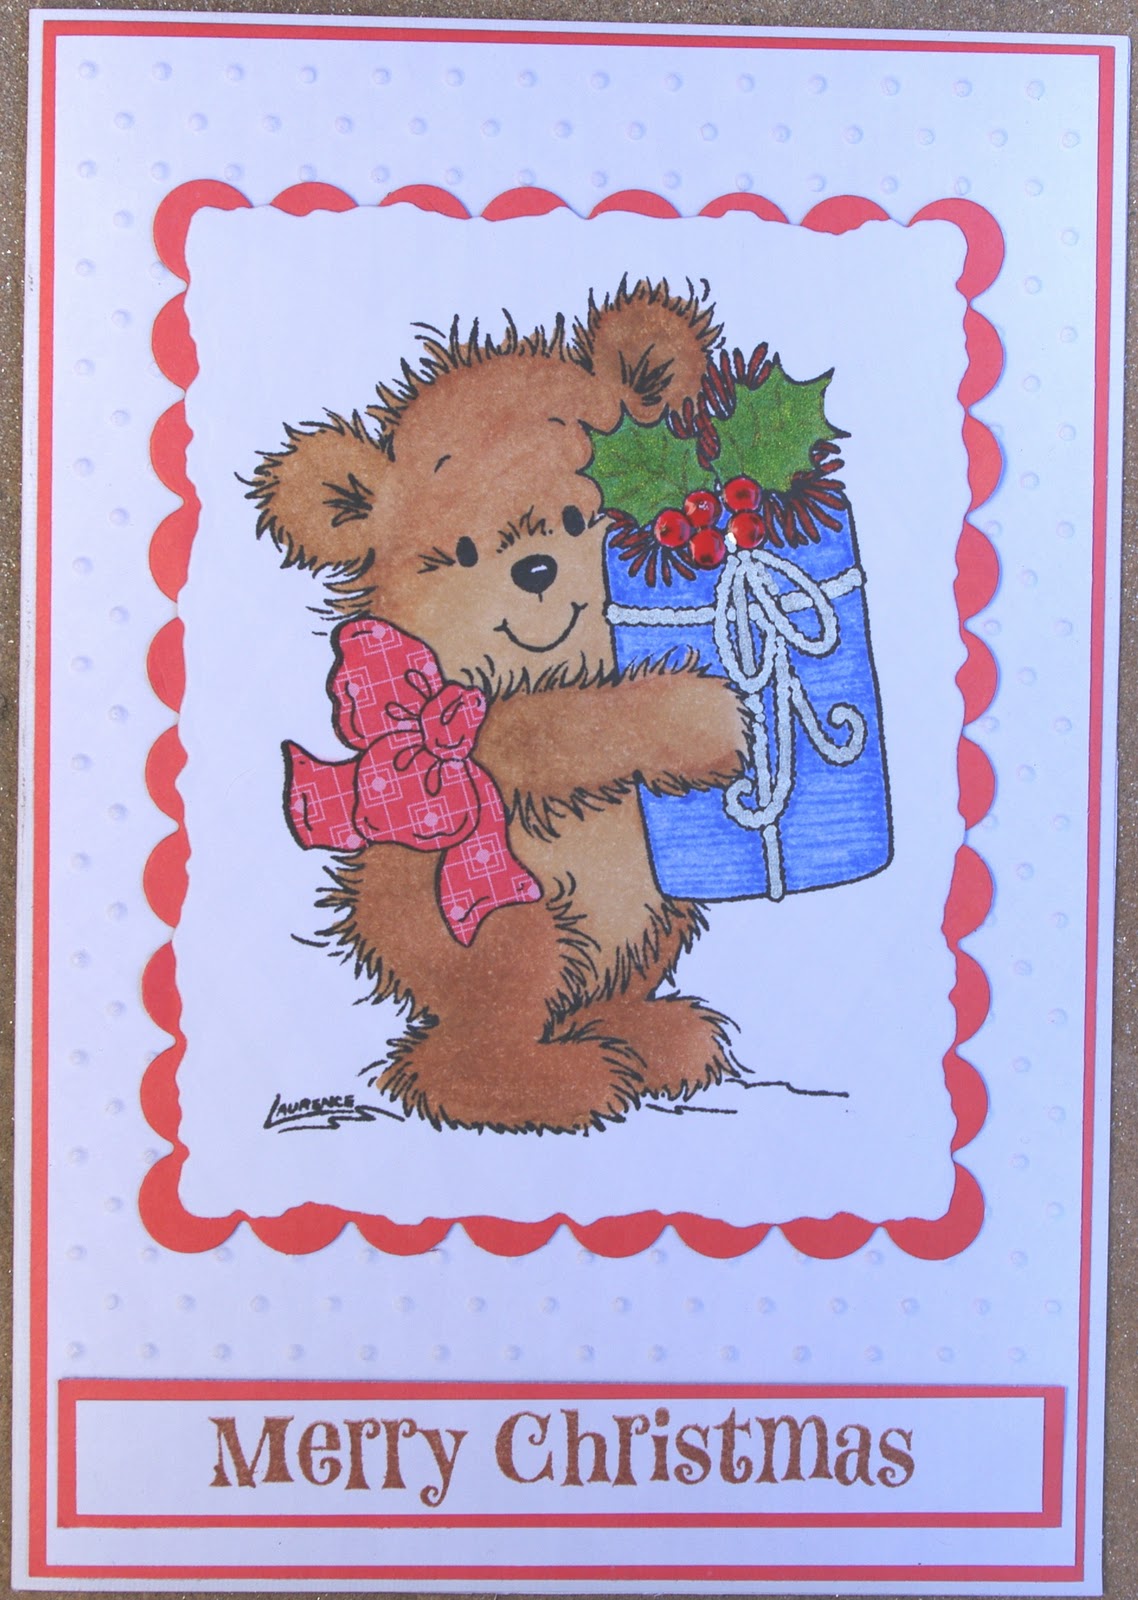
STAMPARVIE - LAURENCE DESIGN - MERRY BEAR

Another cute teddy which I coloured in using Copics, paper pieced the bow after making a hash of it, used Smooches for the holly leaves and Viva Decor Pearls for the red berries.

I then used Nestabilities deckle edged and scalloped rectangles and popped it onto a piece of white cardstock embossed with CB swiss dots.  The sentiment was stamped in Archival Sepia ink.

Wednesday, December 15, 2010

COTTAGE CUTZ - WINTER OWL

Another cute die from Cottage Cutz.  I am getting the hang of these dies now and not spending so much time trying to fathom them out.  I do love the fact I get to use up my scraps.

The circle die is Nestabilities Eyelet Circles and the background is a CB snowflake embossing folder.  Not sure about the greeting as I tend to rummage through my stamps, pull out the appropriate one and use it without making a note of which one it was.

Monday, December 13, 2010

GIFT BOX FOR HOMEMADE STRAWBERRY JAM & LEMON CURD

This year I decided to do a couple of homemade Christmas gifts.  It was quite an involved process as the jars were sourced to a Stellenbosch factory shop which meant a trip for DH and myself.  The making of the lemon curd and strawberry jam were the quickest and easier part thanks to the Thermomix.  Then came the packaging which was made up as I went along and designed around the bottles. 

The labels used on the bottles are from a Sizzix die and the label on the boxes are a CB die.  The stamp on the box label is from Hero Arts Happy Holiday Tags.  I used MS border punches to decorate the boxes and found some leftover half sheets of patterned paper to liven them up a bit.

Here is one from another angle :

I went off to deliver them on Friday and was delighted they were so well received.

Friday, December 10, 2010

WHIFF OF JOY - HENRY SPENDING LAZY SUMMER DAYS

When this Whiff of Joy Henry stamp arrived I had no idea what sort of card it would suit, I bought it because I loved his grin.  With all of the Christmas stamps on my craft table I thought, for a change, I would do a card to suit a southern hemisphere Christmas.

Henry was coloured in using Copics, the Christmas tree is Hero Arts Sparkle Tree and the Santa sack is from Clear Dollar Reindeer Games.  I sponged the 'sand' under Henry's lounger with Distress Frayed Burlap and on the rest of the card I used Antique Linen.  For the tree and Santa sack I used Stampin up and Tombow markers.  The sentiment is from Peachy Keen on a SU large oval punch.

Wednesday, December 8, 2010

PUNCH ART - SNOWMAN

Another punch art figure which I cased from Ink Me Baby One More Time.  This dear little snowman is quick and easy to make and seeing I had the Peachy Keen snowman faces, I did not have to try and draw one on.

The punches used are all SU as is the sentiment.

Monday, December 6, 2010

SPARKLE CREATIONS - SLEDDING CHLOE

This is a simple card with the image being stamped on special Copic paper.  I used a variety of Copics to colour the stamp in and then cut it out using a Go Kreate die which I picked up in the UK.  They are larger than Nestabilities but are the same concept and can still fit through the Cuttlebug.

The background is a CB embossing folder and the vertical Xmas stamp is from stamps I bought ages ago and they came with no name on.

Friday, December 3, 2010

COTTAGE CUTZ - SANTA, DOWN THE CHIMNEY

This is another of the dies I bought in the UK.  Once you fathom out where each piece goes and what colour to cut them out in it is actually quite simple to piece together.  It does help if you are good at jigsaw puzzles !

I decided to use a red card and two different Nestabilites Labels - the white holly paper being from my stash and the blue one is CM.  The snowflakes are from the MS border punch I am so fond of - one day I will use it as a border punch and not just for the snowflakes !  The sentiment is from Whimsey Stamps - Holiday Ticket Sentiment.

Wednesday, December 1, 2010

CHRISTMAS MONEY HOLDER

When I saw the idea for a money holder on Cindy Lawrence's blog The Creative Closet I knew I had to give it a try. 

I altered the measurements slightly to 9½" x 7" for the base cardstock.  Score at 2" from one side and then at 3½" from the other side.  The wavy border punch is a MS one as is the border punch used on the inside.  I decided to cover the holder in some Christmas paper I had in my stash and then cut out 3 Nestabilities Labels Three.  The sentiment and the border stamp on the top label are from Waltzing Mouse and I used SU Close to Cocoa ink for both.
The bow is recycled from a gift previously received. 

This is the inside of the money holder.

Monday, November 29, 2010

WHIFF OF JOY - ICE SKATING HENRY MOUSE

Henry definitely has the 'cute' factor that I love so much.  He was quick and easy to colour in using Copics.  I paper pieced his jacket with a scrap of paper lying on my craft desk and added some Stickles for snow.

Not sure about the embossing folder as I do not think it is a CB one.  The red paper used for the background was plain and I stamped 2 different snowflakes around the edges using SU craft ink - Whisper White to liven it up.

Friday, November 26, 2010

 SANTA XMAS CARD

For this card I started with the idea of using the Art Impressions Santa Front and Back image and then I sort of got a little carried away !

The card is SU Creamy Caramel textured cardstock with the front being cut in half leaving only the bottom half attached.  I then started with bricklaying on the chimney using the Fiskars squeeze rectangle punch and scrap bits of brown paper.  Once it was all glued I Distressed Inked the chimney to give it a weathered look and added the icicles using a MS border punch called Drippy Goo.

Santa was coloured in using Copics and the front and back were cut out and stuck together.  As Santa appeared to be standing in midair and I had trouble with designing a roof I thought I would go with another chimney - easy since I had 'bricks' left over.
When the card was closed it looked a bit too bare on the top so I stamped a sleigh from the Inkadinkado Filigree Holiday Pattern set and a reindeer from Victoria Case Art Designs onto a piece of cardstock.  The snowflake background was done using a couple of stamps from the Inkadinkado Warm Holiday Wishes set plus SU Whisper White craft ink and the gifts are from Clear Dollar Filled with Cheer.  All these were coloured in using a mixture of Tombow, SU and Marvy Le Plume II markers.
I love using a mixture of stamps and markers together and have to smile when companies want you to put their specific trademark 'handmade by' stamp on the back of the card.  Think I would have run out of space on this one !

Wednesday, November 24, 2010

STAMPIN UP - MOOSE FANCY FAVOR BOX

Looking at this picture it has just struck me there is nothing Christmasy about it.  Will have to put a suitable tag around the handle to rectify that as I made it for Xmas.

Of all the SU Bigz XL dies (can be used in the Big Shot but not the CB) my favourite it definitely the Fancy Favour Box.  I used Distress Ink on the sides of the box and attached the handle with brads.  The decoration on the handle is from a new SU die, also a Bigz XL one, called Tasteful Trim. 

The moose was cased from a card I saw on  Card Scraps blog .   I did alter the moose to suit the punches I had using a CB leaf die for the antlers, part of the SU Two Step Bird punch for the ears, the head is a SU retired punch and the nose / mouth section is a SU Wide Oval.  The arms are SU Word Window and the gift is made using Nestabilites long rectangles.

Monday, November 22, 2010

STAMPIN UP - FANCY FAVOR BOX

With Christmas being just around the corner I thought I had better get a move on in making a couple of boxes.  I cased this one from the Add Ink and Stamp.blog and followed the detailed instructions.

The long scalloped white trim is from a SU Bigz XL die called Tasteful Trim as is Santa's beard.  The moustache was made using 2 SU ovals.  I could not find a suitable punch for the hat so used a Nestabilities egg shaped die which seemed to do the trick.  The snowflake is from a MS punch.

Friday, November 19, 2010

COTTAGE CUTZ DIES - STYLIZED OWL

When I saw this owl die I just knew I had to have him.  I had seen Cottage Cutz dies on the Peachy Keen online store and thought they were exclusive to them.  Imagine my delight when I saw them in  the UK store I went to.

The owl is cut from scraps and sponged with Distress inks.  The background papers are SU with the exception of the yellow which is CM.  The sentiment label punch is from EK Success and the oval is SU as is the sentiment.  I decided the page looked a little bare and added a freehand frame around using a Tombow marker.  I enjoy drawing squiggly frames as I have a hard time drawing a straight line !

Please excuse the shadows on this card as it was photographed in the early morning sun.  What is good about an image like this is seeing you have the CB, die and papers out you can do more than one at a time.  I did 5 and have put them in a packet for when I need to make a card in a hurry.

Wednesday, November 17, 2010

GINA K DESIGNS - FUNNY FARM

These two smaller cards are also from the Funny Farm kit.  Again, not normally colours I would put together but sometimes you have to try new ideas.

The background embossing folder is from CB, the scalloped edge border punch with a hole in is an EK Success one and the plain, larger scalloped edge punch is from SU.  The scalloped heart is a Nestabilities die and the corner punch used is from CM.

The stamps were coloured in using Copics and the jury is still out on the pink used for the pig - I think it is way too bright and need to get some softer pink colours in Copics.

Monday, November 15, 2010

KRAFTIN' KIMMIE - ARIANA

When I ordered this stamp I had my youngest niece, Alana, in mind.  She loves mermaids and with her birthday being yesterday I thought it would be perfect.

This was my first Kraftin' Kimmie stamp and I am impressed with how easy it was to colour in.  I did use Copics as I wanted to get the shading in the hair right.  The seaweed, and bubbles are also part of the stamp set.  The fishes and sentiment are from Hero Arts Oceans of Joy with the fishes being completed ages ago - I found them in a container where I keep finished images.  The background  is painted using Perfect Pearls and a paint brush.  It was a bit fiddly and at one stage I thought I would have to scrap it but in the end it turned out alright.

On the white cardstock background I used a CB border embossing folder and on the middle blue section I sponged the blue paper with Distress ink to get it to the colour I wanted.

Friday, November 12, 2010

GINA K DESIGNS - FUNNY FARM

This card was another in the card kit and only once I got started with it I realised just how fiddly and involved it was.

The colouring in is all with Copics (the kit provided paper specifically designed for use with Copic markers).  The ribbon came with the kit and I used a SU scallop border punch underneath it.  I did use chalk around the trees as I had allowed the Copics to bleed a little over the line and could not get rid of it.  The chalks seem to hide the problem.

Wednesday, November 10, 2010

GINA K DESIGNS - FUNNY FARM

This stamp set came with a free kit and instruction sheet and I thought I would try out their designs.

I do not think I would normally match these particular colours together but it is fun to try something outside of your comfort zone.  All the colouring in is done with Copics and the background is a CB folder which I totally forgot I had !  The cutting out as shown in the kit is wider and not as detailed as I would usually do but I thought I would follow the instructions.  I did add a little distressed ink on the sentiment band as it looked just a little plain.

Monday, November 8, 2010

STAMPOSAURUS STAMPS - WHOOPS RUDIE 2

Another cute stamp from the UK.  He appealed to my sense of humour !

I coloured Rudie in using Copics, paper pieced the present and added a couple of snowflakes from the set Sending Holiday Cheer by Hero Arts.  The sentiment is also from the same Hero Arts set and the background paper is CM.  I thought the Nestabilities Ovals, classic and scalloped, suited the image perfectly.

Friday, November 5, 2010

STAMPOSAURUS STAMPS - DUCK

I could not resist this stamp set on my recent trip to a craft store in the UK.  These little ducks stamp really well and are easy to cut out around the frame.

Using 3 different shades of Copic orange I coloured in the feet and beaks and used yellow for the small ducks.  When it came to the larger ducks I was not sure I had the right colour Copics so I opted to use chalks for them.  This gave it a subtle look which is what I wanted.

The embossed background is from a Sizzix folder and the orange strip is from a pack by Doodlebug Designs Inc. called Paperbug.  The sentiment is from the same Stamposaurus set.

Wednesday, November 3, 2010

With just having arrived back from a short break I have no finished projects to pop onto the blog.  I have, however, been looking through a few other blogs and think you might be interested in the following punch art projects :
Hope to be back to normal by Friday.  I have a couple of new cute stamps I want to try out.

Monday, November 1, 2010

HALLOWEEN TREAT BAG

I made this small treat bag using a paper bag from Merrypak on the inside and  black cardstock for the outside.  With the inside paper bag I used my SU scalloped edge border punch and then coloured it with Distress Ink to give a light orange colour.

The ghost stamps are from Peachy Keen Nikkity Knack Cat Gang coloured in using only chalks and the witches hat is from SU Wicked Cool.  The Spooky sentiment is SU Seasonal Greetings and the 'tasty sweet' one is SU Holiday Best.  The handle is twine from the local hardware store.

Thursday, October 28, 2010

STAMPIN UP - OWL PUNCH

From the moment I saw the new SU owl punch being used on the various blogs I knew I just had to get my hands on one.

For the Halloween owl's wings I used a CB bat die.  The circle behind the owl was sponged using Spiced Marmalade Distress ink and the background paper, with distressed edges, is from a pad I have.  The sentiment is from the SU set called Holiday best and the die used for the box is SU Bigz XL Box #2.

Tuesday, October 26, 2010

PUNCH ART - MR ACORN

When I saw this idea  from Stamp and Scrap with Frenchie, who even has a video on how to make the acorn, I just knew I had to try it out. 

For the face I used the SU ornament punch, the mouth is a SU small oval offset and punched twice, the hat is SU medium and wide ovals and the top of the hat is a Fiskars punch.  The nose and eyes are brads, the eyebrows are hand drawn and the cheeks are done with a SU sponge dauber and SU Rose Red ink.  I sponged around the face using Tea Dye Distress ink and used a white gel pen for the dots on the cheeks and marks on the hat.  For the fringe and bow I used some raffia I had over from a flower arrangement.


The leaves are Hero Arts Real Leaves coloured in using SU crayons and a blender pen.  I did the same leaves with Tea Dye Distress ink to stamp on a piece of green bazzil for the background.  The sentiment is from the SU set called Well Scripted and the label punch is an EK Success one bought locally.  I used Tea Dye Distress ink on the stick-on paper ribbon.

Thursday, October 21, 2010

POPCORN THE BEAR - SOUFFLE

Popcorn the Bear stamp sets are just so cute and this set has smaller images which are perfect for cards.  They also come with a full colour insert complete with 2 card ideas - it does not get easier than that !

The little chick was coloured in using Copics and the duvet was paper pieced.  I then cut the image out and placed it onto 2 Nestabilities ovals.  The background paper is from a thick pad bought at Simply Creative and the flowers and flower brad are from my stash.  The sentiment is also from the Souffle set.

Tuesday, October 19, 2010

INKADINKADO - DOODLE WINTER

This is a very simple Xmas card.  I stamped the image onto a Nestabilities label die and Distress inked the edges.  When I looked for background paper the red one had a small tear in it so I decided to distress the edges with a distressing tool.  I also did the green cardstock as well.

The sentiment is from Kaszazz and it fitted perfectly onto the SU Modern Label punch.

Thursday, October 14, 2010

HERO ARTS - BABY REINDEER

Yes, I know this is a bright and gaudy card but every now and again I just need to do one.  The Hero Arts reindeer was bought from Ronita at Simply Creative as was the Nestabiities large scalloped square.

I coloured the reindeer in with markers and a blender pen and popped on some glitzy jewel type thingies (it's been one of those days and I cannot for the life of me remember what they are called !).  When I was looking for a Nestabilities to fit around the image the petite scalloped circles seemed to do the trick.  The sentiment is on a SU oval matted onto a another SU punch.  Background papers are all from a pad I picked up at Simply Creative a while back.